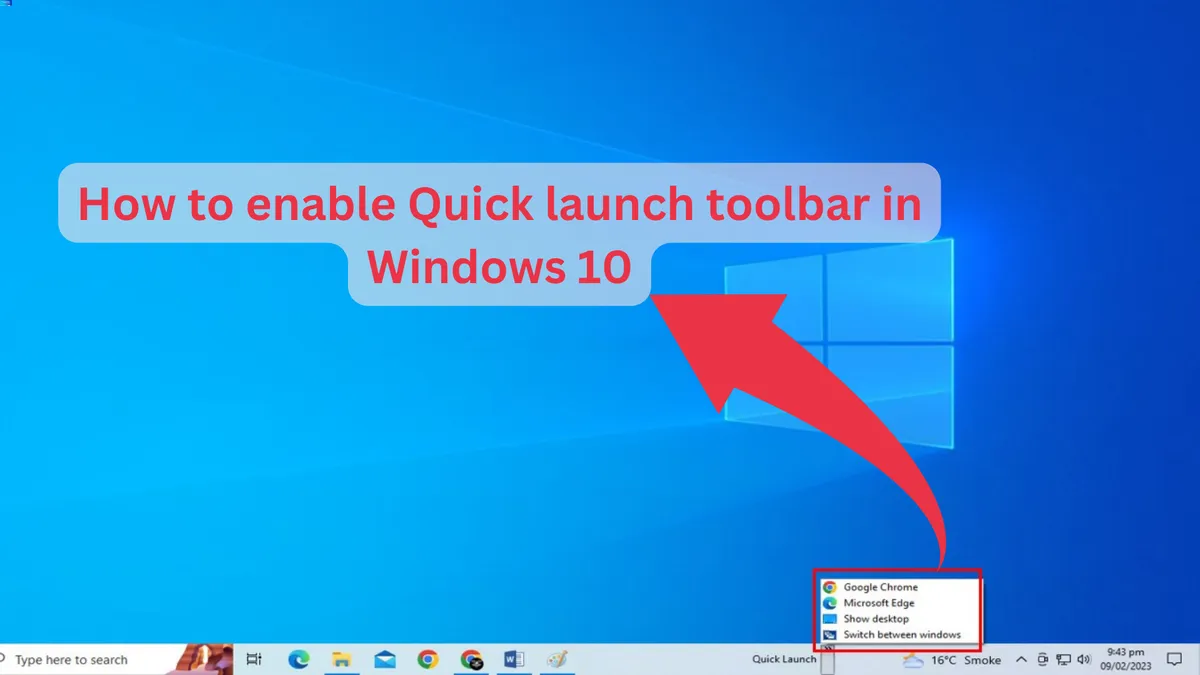
The Quick Launch toolbar in Windows 10 is a powerful tool that allows you to quickly access your frequently used apps, files, and folders. With just a few clicks, you can launch your favorite applications, making your work and personal tasks more efficient. This feature, however, is not enabled by default in Windows 10, but adding it to your taskbar is a simple process that can save you time and improve your overall productivity.
Quick Launch Toolbar in Windows 10
In this guide, you will learn how to enable the Quick Launch toolbar in Windows 10 and start enjoying the convenience and speed it offers. So, if you’re ready to boost your workflow and streamline your access to important files and apps, read on to learn how to get quick access to your apps through Windows 10’s Quick Launch toolbar.
The Quick Launch toolbar is not enabled by default in Windows 10, but you can add it to your taskbar by following these steps:
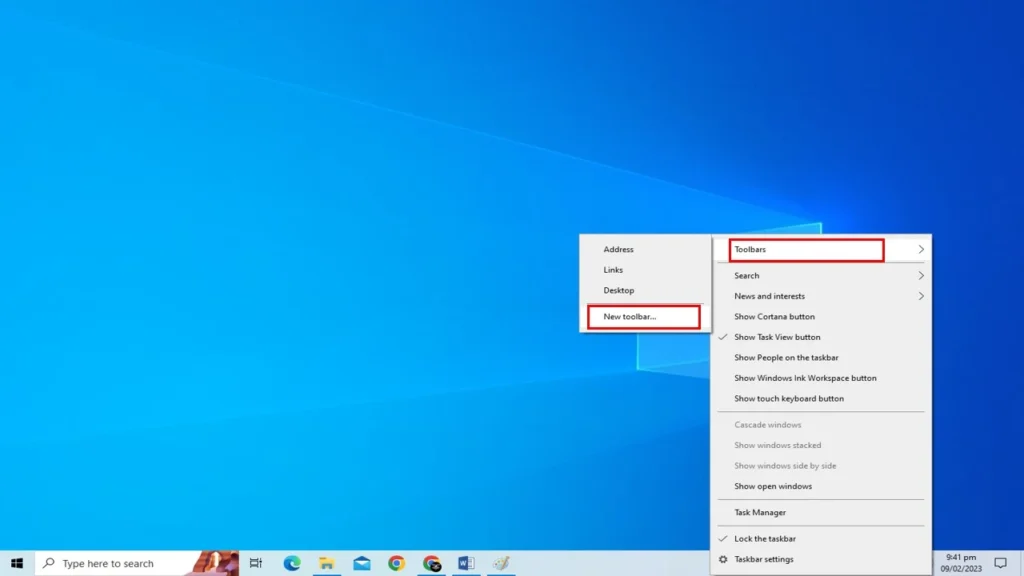
1. Right-click on an empty space on the taskbar

2. Select “Toolbars” and then “New Toolbar.”

3. In the folder location field, paste the following path: %UserProfile%\AppData\Roaming\Microsoft\Internet Explorer\Quick Launch
4. To add a folder to the Quick Launch toolbar, click “Select Folder.”
5. You can now move the Quick Launch toolbar to your desired position on the taskbar by clicking and dragging the dotted separator to the left of the Start button.
You can add shortcuts to the Quick Launch toolbar by simply dragging and dropping them from your desktop or any other folder. Simply pick “Delete” from the context menu by right-clicking on the shortcut.


