The Quick and Simple Method for Burning ISO Files to Disc on Windows 10
Are you looking for a fast and straightforward way to burn an ISO image to a CD or DVD on your Windows 10 computer? Then look no further! In this guide, we’ll show you a simple method for writing an ISO file to a disc in just a few easy steps. Whether you’re creating a bootable disc for a fresh installation of Windows or just need to backup some important data, this guide has you covered.
Burning ISO Files to Disc on Windows 10
In this guide, we will walk you through the process of burning an ISO image to a CD or DVD on your Windows 10 computer. This method is quick and straightforward, and it can be done in just a few simple steps. By following this guide, you’ll be able to create a bootable disc that you can use to install an operating system or backup important data.
Whether you’re a beginner or an experienced user, this guide is designed to help you get the job done with ease. So, let’s get started and take a closer look at the steps involved in burning an ISO image to a disc on Windows 10.
To burn an ISO image to disc on Windows 10, follow these steps:
1. Your CD/DVD drive should now contain a blank CD or DVD.
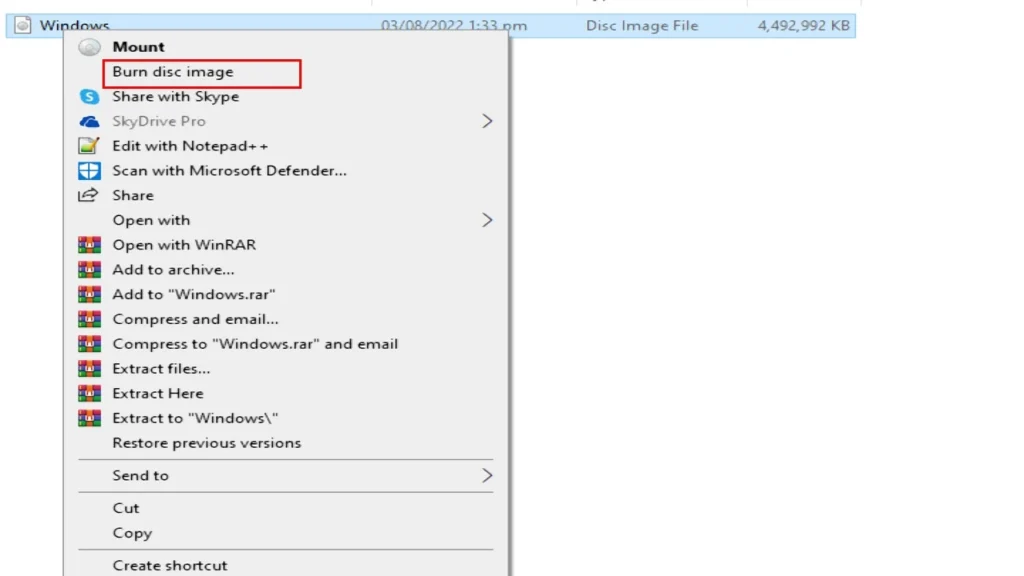
2. Burn disc image by selecting it from the context menu when you right-click the ISO file.

3. If your computer doesn’t have a built-in disc burning tool, Windows will prompt you to download a third-party app, such as “Windows Disc Image Burner.”
4. Once the disc burning tool is open, select the correct disc drive, select the ISO file you want to burn, and click “Burn.”
5. Wait for the process to complete and then remove the disc from the drive.
Note: The process may vary slightly depending on the disc burning tool you use.


